
 For the 48V wires, I decided to construct my own battery cables out of a coil of #4 wire. The cables are stranded so they bend very easily. For cutting the wire, bolt cutters work nice. For stripping, I use a razor knife. For putting on ends, I use a hammer crimper that crimps by being hot with a sledge hammer or in my case an axe. Then I wrapped the ends of the wire in electric tape, put some plastic split tubing on it to protect it, then bolted them. Just to make things difficult, two lug sizes need to be used depending on where the cables attach.
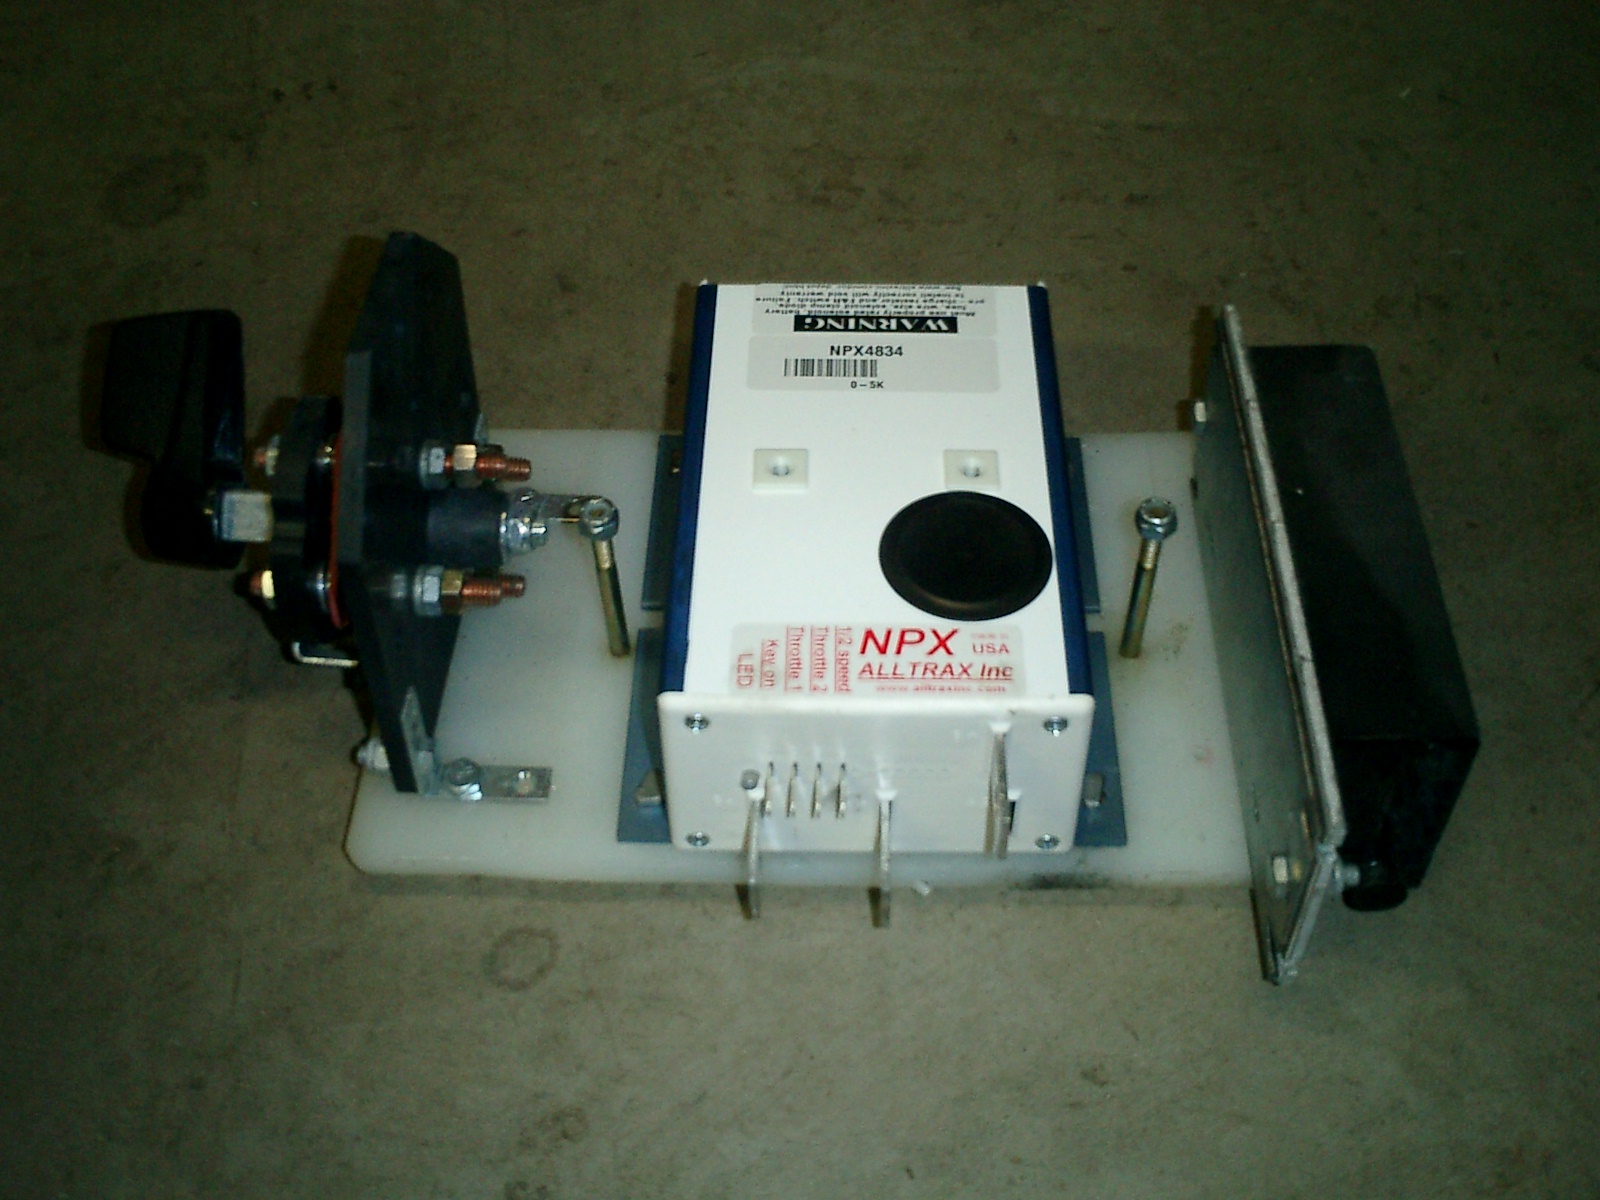 The reversing handle, speed controller and DC-DC converter are shown mounted to a cutting board using "L" brackets, ready to mount to the frame with the two bolts on either side of the speed controller. Using a cutting board not only saves time painting but it's corrosion proof too! You will notice that this DC-DC controller is an upgrade from the recommended one. This converter has a higher capacity than the basic one and is also isolated. This means it will be no problem to install a radio or some other high-power 12V accessory. Being isolated, it's much less likely to send a 48V surge through the 12V system should it fail.
 Here is an image of the 48V wiring so far with the speed controller assembly lifted into place. Due to tight space, I found the lugs from the speed controller should be attached at right angles, then run under the reversing switch to come up where the battery tray is. To do this required using a Dremil tool to cut out a bit of battery tray although I also could have done so from the switch support instead. (see small square cut out on battery tray - to the left of the switch). To attach the lugs to the copper terminals on the controller and contactor, I use stainless steel nuts which I hope will resist corrosion better than the typical nut.
 The wiring is also modified slightly from the plans. Two 48V wires needed to meet at a terminal in the contactor hump. However space was very tight there. So I moved the connection point for the two wires from the contactor lug bolt up the wire to the switch lug bolt. Electrically, nothing significant has changed. However, it's much easier to wire! Clicking on the image will show a larger version of the wiring diagram to show where I modified the wiring.
According to plans, the only thing holding on the motor cover is a strip of Velcro running down the trailing arm. I have found that's not sufficient since it's possible to go over a bump and lose the motor cover. So, I would recommend supplementing the velcro with a bolt as well. Just be VERY careful when drilling bolt holes for the cover. The motor has magnets in it so it's possible metal filings could be attracted to the inside of the motor causing BIG problems.
 So, if the motor is already installed, before drilling, wrap the motor in plastic to prevent any metal drill filings from being drawn into the motor vents!
 Tools used:
Razor knife
Dremil with cutting wheel
Adjustable wrench(s)
vice/hammer for making bolts
Bolt cutter
crimp tool
axe or large hammer (for crimp tool)
Parts used:
Wire Lugs 3/8 and 5/16 size for #4 wire $50 + shipping - ebay.
Electrical tape (3M brand)
Several lengths of #4 wire from wire spool (spool was $89+shipping)
(12) 5/16-18 Stainless steel nuts for contactor, reverse switch & custom controller bolts.
Around 6 inches of brass all thread to make bolts (since I forgot to pick up some at the hardware store)
Labor:
Around 3 hours.


No comments:
Post a Comment